Following the completion of the opening event, access to Guild Wars 2's new style of dungeon experience was released to adventurers all over Tyria, even to those who are not quite lv80 yet when they were scaled up to lv80 for the weekend long event so that they could experience the dungeon alongside veteran players. When the portal opened, Unfathomable Writings was there to take the first step into Fractals of the Mists, a dungeon-crawling adventure like no other.
First thing we were greeted with through the portal was Dessa's Laboratory, which served as the central nexus for movement through the many instances to be found within the mists. General goods and repair venders were to be found here, as well as the namesake NPC Dessa and her assistants.
Stepping onto the platform in the centre of the room we were greeted with a prompt asking us if we were ready to travel deeper into the mists. Not knowing quite what to expect, we all ticked our ready status and waited for Dessa to plunge us into the chaos that was to come. Loading times were smooth, and our experience proved to be pleasantly bug free.
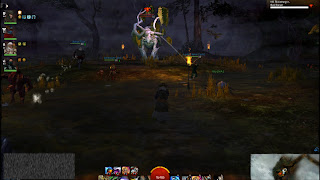
First up we were thrown right into the middle of a dark, gloomy swamp. None of us had a clue where we were, or how to get out of this hellhole we found ourselves in. Two steps into the swamp and we were confronted by our first fight, a Champion Marsh Drake. Surprised to find such a high level monster as our first opposition we eagerly joined the fight, burning the creature down, and were disappointed to find no loot reward given for our kill. It appeared that champions were to be a normal trash mob in this particular instance.

Having dispatched the foul champion beast, we explored further into the swamp and found our way blocked by three locks. To open these locks we would need to recover the three wisps that would release them. The said wisps were scattered across the swamp, hidden behind hordes of monsters and masses of discretely placed traps. To complete this puzzle, we were forced to collect all the wisps in one go, rushing back to the locks on a thirty second timer. This was not so easy to achieve, for traps and monsters were determined to delay our flight, and the swamp itself was pitted against us when impenetrable walls of vines rose and fell, blocking out path. Our challenge was made even harder when the same Champion Marsh Drake continued to respawn on a timer of only a few seconds. He was joined by the Mossman, a purple bordered boss. After numerous attempts, uncountable crippling traps, and running around like a madman to try and get away from the Mossman, we were victorious.
Inside, we travelled through an underwater passage which eventually opened up to the small glade belonging to a twisted and hostile Tree Ent, Bloomhunger. The boss himself was a pushover and we had very little trouble dispatching him. During the fight he would drop poison AoE circles, for the most part easily avoidable. He would also summon elementals to buff him, but the adds were dispatched within seconds, offering us no challenge at all. Once defeated we were treated to a chest containing several random items, sometimes rares, as one of our party managed to get. Dessa then spoke to us through the nether, prompting if we wanted to continue on to the next dungeon. Sure, why not, we thought; that wasn't so bad.

But Dessa had larger games for us to play. As soon as we arrived in the second dungeon, we knew we were in for an amazing encounter. Drawn right into the middle of an all out war between the charr and an ascalonian city, we were forced to use charr disguises and join the battle alongside the charr as they assaulted the walls, confronted the enemy commander and threw their gates wide open. It was not an easy battle to win. The enemy turned their seige weapons on us. Catapults fired on our position, the arrows from carts reigned down from above and the enemy tipped burning oil on us whenever we got near the gates. With some amazing ranged combat by one of our party, we were able to take their weapons down and attack the gate.

On the other side of the walls we fought our way through streets crawling with enemy soldiers, the city itself turned into a complicated maze network by the blockades the ascalonians had erected. Eventually we found our way to the central courtyard where we were greeted by an army of enemy soldiers manning catapults. After dispatching the opposing forces and capturing the courtyard we defended the charr magician as he performed the ritual needed to win the day and destroy the ascalonians. They were not going to give up so easily though. Their leader retaliated, leading an attack against our position. Much to our disappointment though, the boss of this instance put up less of a fight than Bloomhunger had. Victorious, we took our reward from the chest and moved on to the next stage.
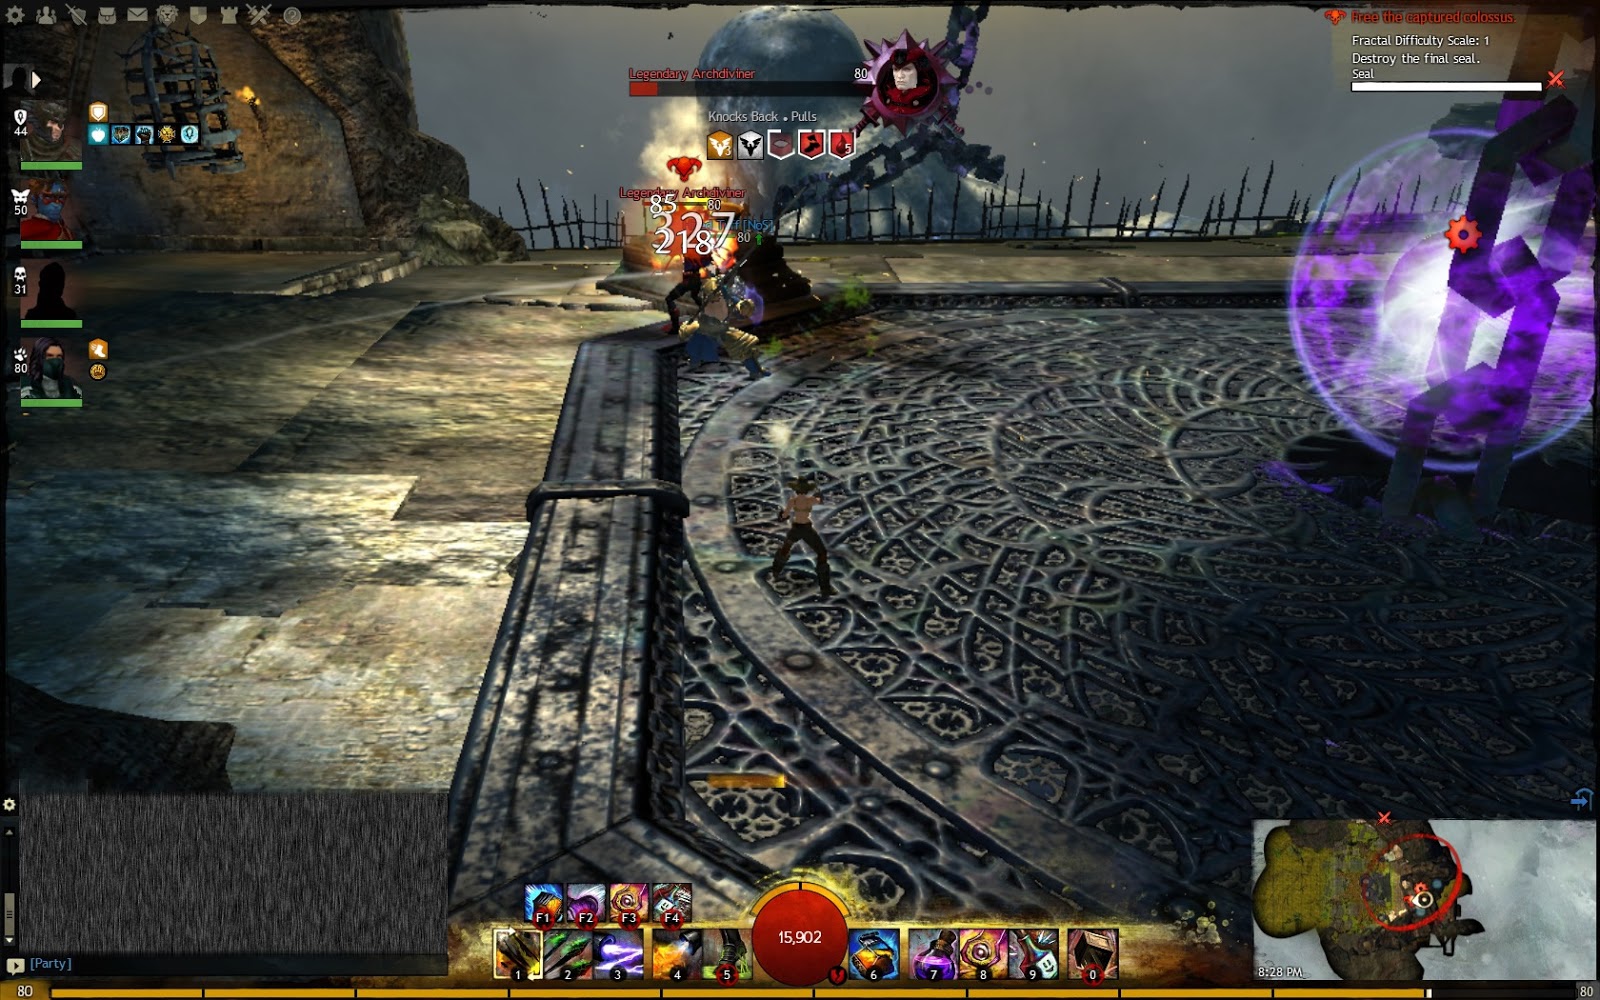
Our final adventure inside the Mists involved scaling a massive colossus who had been imprisoned by a dark cult. At the colossus's feet we were confronted by the boss of the instance, the Legendary Archdiviner. Putting up more of a fight than expected, the head cultist drops his magical hammer and flees deeper into the ruins. Taking his weapon we climbed the scaffolding, making our way to the top where the Archdiviner waited for us. Little did we know the challenge that awaited us along the way.

Our first stop was the giant's knees, which were bound to the cliff by a magical seal. The only way to break the seal was to charge the Archdiviner's hammer with the blood of his fellow cultists. Veteran mobs attacked us, aiding the trash cultist mobs in their fight, making our attempts to free the colossus difficult indeed. It was made worse by the debuff placed on the party member holding the hammer. When the debuff stacked forty times, the player would be killed instantly. Our only choice was to pass the hammer between us before we reached that fatal number. Three charges later, the knee was free and we moved on to the next one, repeating the process. Victorious, we proceeded up the scaffolding, making our way to the chest seal. This one proved to be the easiest of them all, and it wasn't long before we were working our way up even higher. Little did we know what waited for us halfway up the ruins.

Faces that blew strong winds at us threatened to throw us from the edge, plummeting to our death below. Luckily, this instance had checkpoints, so if you died, you respawned at various stages up the side of the ruins, and not from the beginning. This was the only instance to offer us this feature. During this adventure we discovered that once you leave the instance, it appears that there is no way back in. Entering the Mists would result in you being thrown into a completely different instance from the one the rest of the party was in. Which was unfortunate, since several of us had forgotten to bring repair canisters By the look of the red gear we had towards the end, we really needed that repair vendor, but to return to Dessa's lab would wipe all our progress in this instance.

The wrists proved to be a greater challenge. They were protected by shields and you could only strike the seal once before the shield made it invulnerable. We were forced to run back and forth between the wrists, fighting off the hordes of cultists that spawned while hit by hit, we broke the seals down. All that was left was to free the head and confront the Legendary Archdiviner at the top. This would be no easy achievement, especially since we were now one man down. After dodging fireball traps that played the same tricks on us that the wind did, we at last reached the top of the scaffolding and were greeted by the final boss.

The Archdiviner turned out to be both the most challenging of the three bosses and the most interesting. In the centre of the room was the final seal, restraining the colossus's head, but it was protected permanently by a shield. The only way to get past the shield was to confront the Archdiviner and burn his health down a quarter. During the fight cultists ran to his aid, making for a tough fight, but when the shield broke for the first time we rushed in, killing the adds to charge the hammer. We failed. The Archdiviner's attacks were serious business, nearly one-shotting several members of the party. Luckily for us, his health never regenerates, even when you wipe, until he is almost dead, but even then his health will never regen past quarter full. The fight wasn't made any easier by our severely broken gear. In the end, several of us were forced to purchase canisters from the Black Lion Trading Co. in order to continue fighting.
Down to half health, the boss changed his tactics, releasing a high-damage AoE attack that left burning DoTs on us. I can tell you now, those burns hurt, bad. Unless you could switch the conditions into boons, you were most likely dead if you got caught in it. during this stage the boss started teleporting party members he came in contact with into cages where they were forced to break their way out of, or enlist the aid of other party members to free them.


The final stage of the boss saw his teleporting trick continuing throughout the fight while he spawned baby karka to help him fight. Fortunately, his AoE attack ceased to happen during this stage, making it easier for us to burn him down and release the shield around the seal. It only took three hits to break the seal and emerge victorious as a four man dungeon team. We were treated to one last treasure chest while the Colossus made his way off into the distance after bowing his thanks to us. We were then transported back to Dessa's Lab, where we could continue on with level two, if we so chose to do so.
Overall, our experience ended on a very positive note. Unlike other dungeons, we'd succeeded in clearing path one of the Mists on our first day, without pulling any hair out, enjoying every moment of it - especially when we were knocking down the walls of that ascalonian city - and coming out of our adventure thoroughly satisfied. I commend ArenaNet on their fantastic new dungeon and its flawless, bug free, progression.


 Having dispatched the foul champion beast, we explored further into the swamp and found our way blocked by three locks. To open these locks we would need to recover the three wisps that would release them. The said wisps were scattered across the swamp, hidden behind hordes of monsters and masses of discretely placed traps. To complete this puzzle, we were forced to collect all the wisps in one go, rushing back to the locks on a thirty second timer. This was not so easy to achieve, for traps and monsters were determined to delay our flight, and the swamp itself was pitted against us when impenetrable walls of vines rose and fell, blocking out path. Our challenge was made even harder when the same Champion Marsh Drake continued to respawn on a timer of only a few seconds. He was joined by the Mossman, a purple bordered boss. After numerous attempts, uncountable crippling traps, and running around like a madman to try and get away from the Mossman, we were victorious.


 Faces that blew strong winds at us threatened to throw us from the edge, plummeting to our death below. Luckily, this instance had checkpoints, so if you died, you respawned at various stages up the side of the ruins, and not from the beginning. This was the only instance to offer us this feature. During this adventure we discovered that once you leave the instance, it appears that there is no way back in. Entering the Mists would result in you being thrown into a completely different instance from the one the rest of the party was in. Which was unfortunate, since several of us had forgotten to bring repair canisters By the look of the red gear we had towards the end, we really needed that repair vendor, but to return to Dessa's lab would wipe all our progress in this instance.
 The Archdiviner turned out to be both the most challenging of the three bosses and the most interesting. In the centre of the room was the final seal, restraining the colossus's head, but it was protected permanently by a shield. The only way to get past the shield was to confront the Archdiviner and burn his health down a quarter. During the fight cultists ran to his aid, making for a tough fight, but when the shield broke for the first time we rushed in, killing the adds to charge the hammer. We failed. The Archdiviner's attacks were serious business, nearly one-shotting several members of the party. Luckily for us, his health never regenerates, even when you wipe, until he is almost dead, but even then his health will never regen past quarter full. The fight wasn't made any easier by our severely broken gear. In the end, several of us were forced to purchase canisters from the Black Lion Trading Co. in order to continue fighting.


0 comments: